Step-by-step process to install and customize generatepress premium theme. Generatepress theme hooks and setup google analytics, last update date, author box and google adsense.
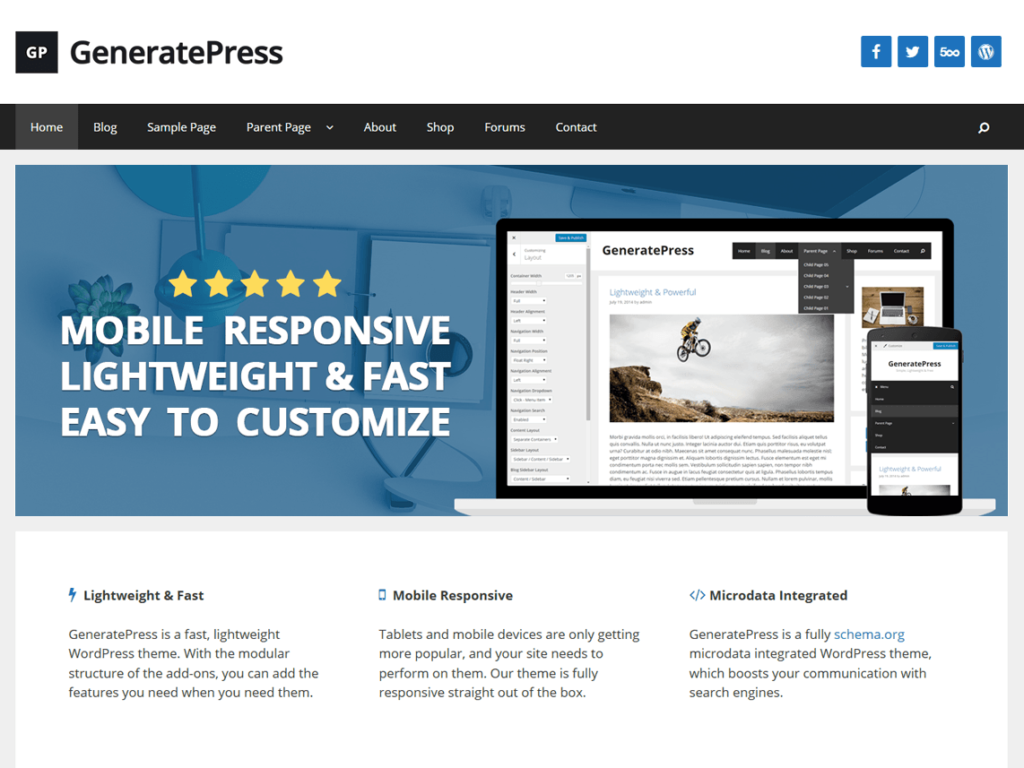
Most people do not know how to customize the GeneratePress premium theme from an SEO perspective.
So, in this article, we are going to guide you step by step that how you can customize your GeneratePress theme to better optimize and increase the speed of your WordPress site.
GeneratePress is a flexible, lightweight WordPress theme that’s easy to use and adaptable. GeneratePress is the best option for those looking to create a fast, SEO-friendly website.
Both a premium and free version of the theme is available. The GeneratePress premium plugin works with the GeneratePress theme.
What is the GeneratePress theme?
GeneratePress is a lightweight theme that you can use for WordPress sites. The free version has limited features, such as the footer of your website and limited theme options. To access all features, you will need to buy the GeneratePress premium plugin.
The plugin and the theme are compatible with other page builders such as Beaver Builder and Elementor.
You can activate the theme and install it from your WordPress library. The GP premium license must be purchased. You can download the license and then install it within your WordPress admin dashboard.
This tutorial will show you how to install the GeneratePress premium theme and how to customize the GeneratePress premium theme from an SEO perspective.
You can buy hosting from our link and we can provide generatepress premium lifetime version free.
Click here to get buy hosting and drop us an email at hosting@akonline.co.in for the version to be installed.
How to install the GeneratePress premium theme?
Below are the steps to install the GeneratePress theme in your WordPress dashboard.
Step 1: Open Your WordPress Dashboard

Step 2: Go to the Appearane>Themes option in your dashboard area

Step 3: After that click on ‘Add New’ in the top left corner

Step 4: Go to the search box and type GeneratePress
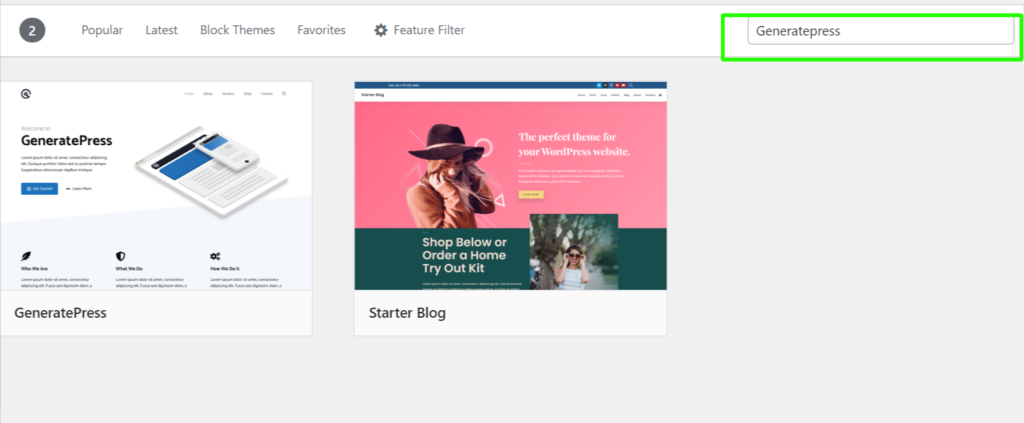
Step 5: Click on Install and Activate your Plugin

Now, you have successfully installed the GeneratePress theme free version for your WordPress website.
How to purchase the GeneratePress premium theme?
Step 1: Go to GeneratePress’ official website and Click on pricing OR
You can buy hosting from our link and we can provide generatepress premium lifetime version free which is $249 dollars.
Click here to get buy hosting and drop us an email at hosting@akonline.co.in for the version to be installed.

Step 2: Now you will see two plan Yearly and lifetime choose whatever you want or your budget allows you.
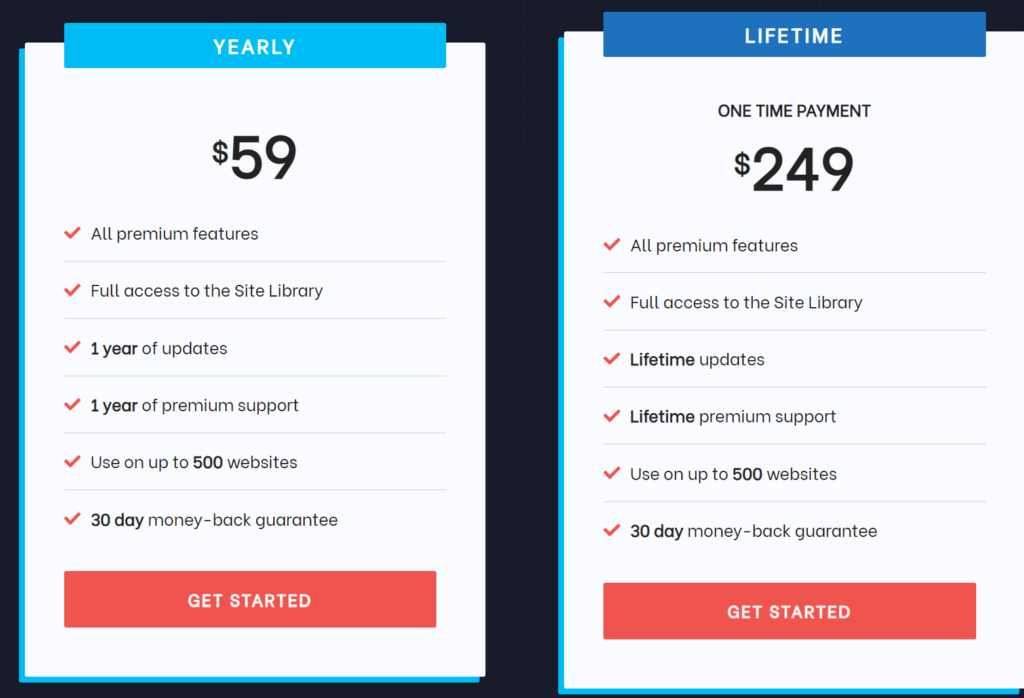
Step 3: Click on Get Started and you will be redirected to the next page.
Step 4: After that fill in all the necessary details and make your payment.
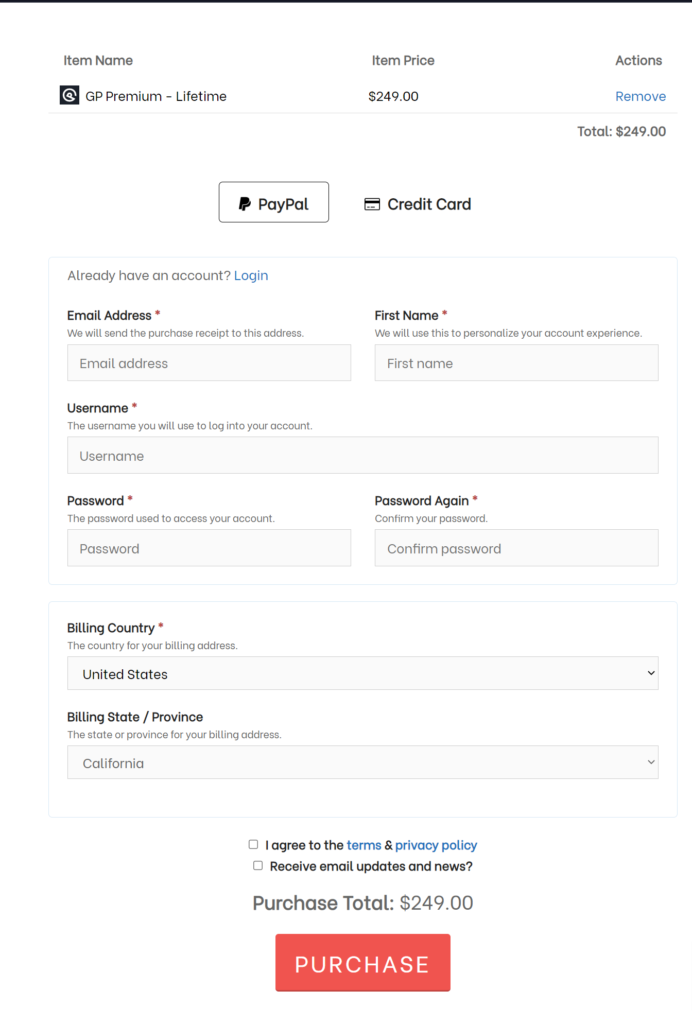
Now you have successfully purchased the GeneratePress premium theme.
How to Install GeneratePress Premium theme in WordPress
Here, in this process, I am going to tell you how to install the GeneratePress premium theme in your WordPress panel.
Step 1: Go to the WordPress dashboard and go to the plugins section.

Step 2: After that click on Add New option in the top left corner

Step 3: After that go to the upload plugin option and upload the zip file that you have downloaded after purchasing the GP premium plugin.


After uploading the plugin Activate the plugin.
CONGRATULATIONS, you have successfully installed the GeneratePress Premium on your WordPress site.
Now, Let’s see how to customize the GeneratePress premium theme from an SEO perspective.
How to activate Elements in GeneratePress?
GeneratePress doesn’t offer themes options like other themes. To insert codes onto your site, you will need to use Elements function. You can use Elements in GeneratePress theme by following the steps below.
- Navigate to the “Appearance > GeneratorPress” section.
- All the modules for the theme can be found here.
- Click on “Activate” to activate the “Elements” option.
- Don’t forget that “Disable Element” is another feature to disable a title. You must activate the “Elements” option.
How to Setup Hooks in GeneratePress Premium theme?
GeneratePress uses WordPress Hooks API for inserting actions throughout the theme.
This allows us “hook” our custom code into different areas of the theme, without having to modify core files.
All available hooks in GeneratePress can be viewed here.
Hooks allows you to easily add content to many of the main hooks, without having to write PHP.
Go to Appearance > GP Hooks to find the Hooks area.
This page provides a visual guide to where these hooks can be found.
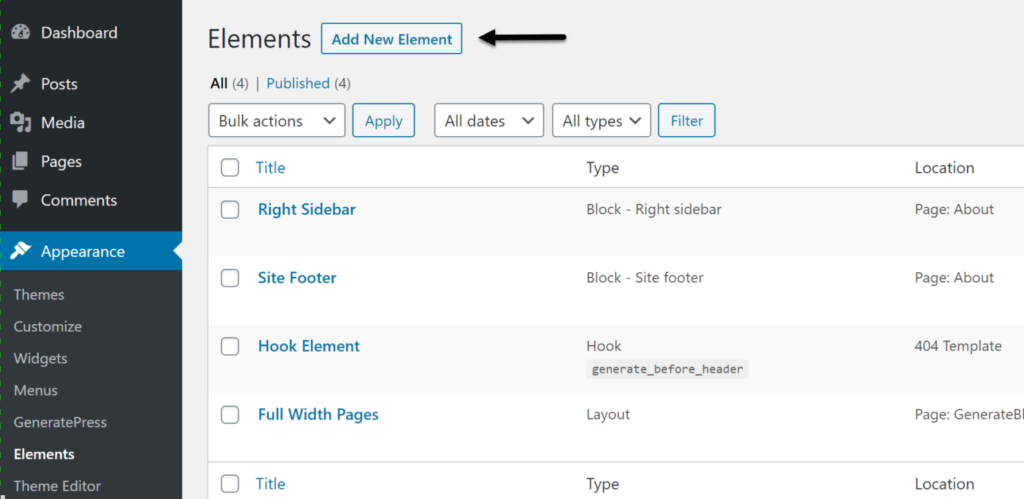
- Click on the “Appearance > Elements” menu button and then click on the “Add New” button.
- Choose “Hook” from the “Choose Element Type” dropdown.
- To apply the codes to the required section of your website, use “Settings” or “Display Rules”.

How to Customize GeneratePress premium theme
1. Insert Author box without plugin
GeneratePress uses CreativeWork schema, which does not require author information. The theme doesn’t have an author biography section that displays author information with gravatar. Hook and custom CSS can be used to insert author boxes on your site.
- Select the option hook dropdown to choose the author box position under the “Settings” tab. Mostly, you would like to insert author box “after_main_content” or “before_comments_container” position.
- As this is a PHP-code, make sure to tick the box that says “Execute PHP”.
- Select “Post” for your location under the “Display Rules”, and then “All Posts”
- This will allow you to add the author box to your blog posts.
Create new hook to paste the below code.
<div class="author-box">
<div class="avatar"><?php echo get_avatar( get_the_author_meta( 'ID' ));?></div>
<h4 class="author-title" itemprop="author" itemscope="itemscope" itemtype="http://schema.org/Person">
<span itemprop="name"><?php printf( get_the_author_meta( 'display_name') );?></span>
</h4>
<div class="author-summary">
<p class="author-description"><?php echo wp_kses( get_the_author_meta( 'description' ), null ); ?>
</p>
<div class="author-links">
<a href="<?php echo get_author_posts_url( get_the_author_meta( 'ID' ) ); ?>" title="Read more">
...
</a>
</div>
</div>
</div>
2. Insert advertisement without plugin
- You can insert Google AdSense, or any other advertising codes, in GeneratePress premium theme.
- Make a new element, and then paste your ad code into the text box.
- Choose one of the following hook positions to insert an advertisement: header, comments or footer; sidebar, inside container, or sidebar.
Below are the steps for showing auto ads using GeneratePress premium theme.
Auto AdSense Ads are a great option if you don’t have the time to manually place codes and only want one code that works on all pages of your website. This type of Ad is easy to set up and forget. Auto Ads display Ads whenever possible.
How to show auto AdSense ads on generatepress Here’s how it works.
- Go to AdSense
- Navigate Ads > Automotive Ads
- Click to Setup Auto Ads
- Copy the code snippet
- Go to Appearance > Element > Add New
- Select Element Type for Hook and name it.
- Copy the code for Auto Ads
- Go to Hook Setting and select wp_head
- Click on Display Rules and select Location as Entire Website. Exclude Page/All Pages.
3. Add Google Analytics in GeneratePress without a plugin
To add Google Analytics tracking code, follow the steps below:
- Create a new hook element.
- Enter a name for the element, such as “Analytics”, and then paste your tracking code into the text input section.
Add Google Analytics
- Under the “Settings”, tab, select “wp_head”.
Assign Header for Hook
- Select “Entire Site” from the dropdown menu on the “Display Rules Tab”.
Setup Location for Hook
Publish your element. Google Analytics has been installed on your website. You can verify this by looking at the source code, and sending a test visitor from your Google Analytics account.
4. How To Display Last Updated Date In GeneratePress WordPress Theme?
The best SEO strategy is to reveal Google’s last updated date. Let’s look at how GeneratePress does it without the need for a plugin.
Step 1 Copy the following code into your theme function.php.
add_filter( 'generate_post_date_output', function( $output, $time_string ) {
    $time_string = '<time class="entry-date published" datetime="%1$s" itemprop="datePublished">%2$s</time>';

    if ( get_the_time( 'U' ) !== get_the_modified_time( 'U' ) ) {
        $time_string = '<time class="entry-date updated-date" datetime="%3$s" itemprop="dateModified">Last Updated On %4$s</time>';
    }

    $time_string = sprintf( $time_string,
        esc_attr( get_the_date( 'c' ) ),
        esc_html( get_the_date() ),
        esc_attr( get_the_modified_date( 'c' ) ),
        esc_html( get_the_modified_date() )
    );

    return sprintf( '<span class="posted-on">%s</span> ',
        $time_string
    );
}, 10, 2 );
You will need to wait until the search results show the date after you’ve added the code to the functions.php file. It all depends on how often your site is crawled by search engines.
This strategy is for ranking boost. This is why you should implement it. Several blog posts were able to rank higher after this procedure was applied. This allows search engines to determine the exact date of modification.
Why it is important to display last updated date?

There are many reasons why you might want to display the most recent update date on your website.
- You want to make sure your readers have the most current content.
- Search engines should display the most recent modified date in SERPs.
- Increase the CTR for your blog.
WordPress stores both a published and modified date for each post. If you don’t use the last modified date code for your blog, then every time you update a post it will display the published date instead of the updated one.
These are some of the important customizations in the GeneratePress premium theme from an SEO perspective. Do these changes in your GP premium theme and you will see the result.
5. How to customize the footer in GeneratePress?
To customize the footer in the GeneratePress theme we are going to install GenerateBlocks. To install the Generateblocks follow the below steps.
- Log into the dashboard.
- Go to the Plugins tab and then Create New.
- Find for GenerateBlocks.
- Simply click to Install and then activate to activate the plug-in.
- Now, you can make use of GenerateBlocks by using GeneratePress Theme.
Activate Element Module
To make use of this feature, called block elements, you must enable the Elements module that is available inside the GeneratePress Premium Theme.
- Log into the Dashboard, then Appearance and GeneratePress.
- Active Elements Module.

Adding Block Element
After activating the Elements Module Go on to the Appearance tab and select Elements to utilize the various features.
For replacing the default footer with a custom one you must make use of the Block Element type. Follow this step.
- Go to the Appearance tab and select Elements.
- Select “Add New Element”.
- Select Block as an element type.
- Hit the Create button.
Add Footer Section to Site
Now, in this step Add the title of the page (The title of the page can be anything) as it is for internal use only.
After that, you will see an Element block in the right sidebar. Select the site footer in the elements.
After that you will see two pre-built templates here you will see lots of other templates but currently it will be only two.
Now you can customize the footer according to your liking.
Conclusion
I have mentioned some of the critical customizations in this GP premium theme from an SEO perspective. I hope it will help all of you and if you have any queries regarding the article do let us know in the comment section, and we will try to help you.
FAQ
1. Is GeneratePress good for SEO?
Yes, GeneratePress is good for SEO. GeneratePress offers seamless customization and a focus on speed and performance. This will improve the loading speed of your website and eventually lead to better SEO rankings. You can easily land your site on the first pages of Google search results.
2. Which theme is best Astra or GeneratePress?
GeneratePress and Astra are both popular WordPress themes. You can’t go wrong either.
Also Read:

